If you are like us, here on the farm, we have tools that have broken or no handles. Today we want to share the step-by-step process on How to Replace a Broken Tool Handle.
Some tools are so well used that the wooden handles wear out and break off. Sometime the handle is not that old, but over used or used in a way that it was not intended to be. Whatever the reason, the head has broken off the handle, the tool is no longer usable. But do not throw those old heads away. It is a fairly simple process to put a new wooden handle on a tool head. Well, maybe simple is not the word but it can be done. You can save that tool, replace the handle and make it usable again. Usually a replacement handle is cheaper than buying a new tool. If you have old farm tools, a new tool is rarely as good as the old ones. You know the saying, they do not make them like they used to. That is true about many things and farm tools are one of them.
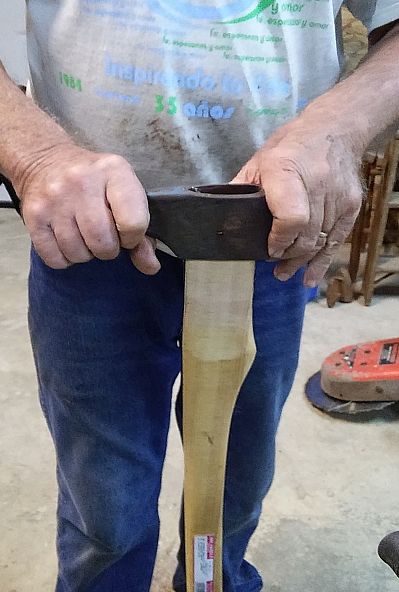
As you can see in the pictures, Popi will be doing the hands-on instructions for this talk.
How to Replace a Broken Tool Handle:
Every handle replacement will be slightly different but putting an old head on a new handle is pretty straightforward. There are some tools or tools that you may need to make this process easier.
Tools you may need to Replace a Broken Tool Handle:
a vice or similar table to hold the tool in place while you work.
a regular size hammer
a hacksaw
a punch or 2
a large hammer
a drill and several drill bits of different sizes
a knife to clean off the wood handle. Think carving the handle neck to fit the new head.
a board to put on the top to cushion the wedge.


1. The first step is to find a replacement handle that fits the shape and size of the tool head center.

2. Put the tool head into a vice or table to hold the head still and in place while you work.

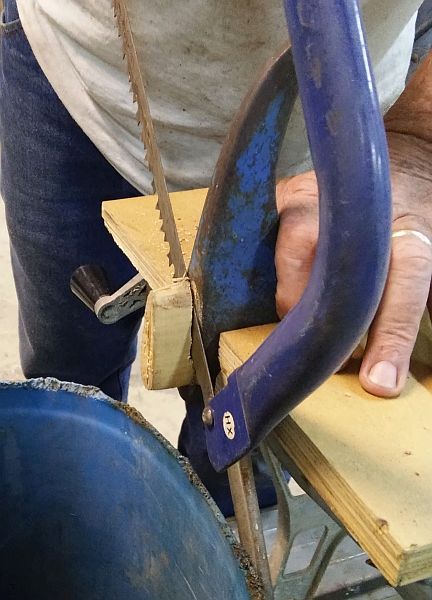
3. With the hacksaw, cut off the broken wooden handle to make it even with the metal head.
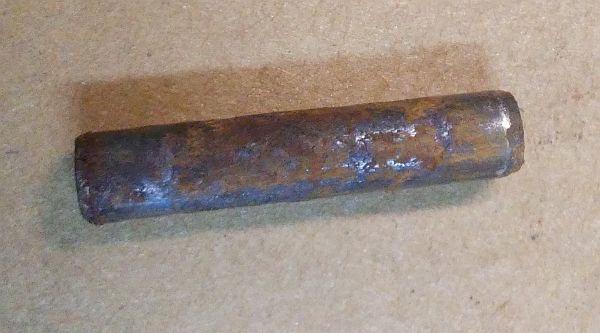
With this particular tool head, there was a metal pin in the center of the head to hold the wooden handle on. Most regular axe heads, hammers and such tools do not have this metal pin.


4. With the correct size metal punch and hammer, push the pin out one side of the tool head and remove it. Keep it to put back in later. If you are working with a tool that does not have a metal pin, skip this part.


5. Take an electric drill with a small drill bit and drill several holes in the wood part of the handle that is still in the middle of the metal head making sure you stay clear of the metal head. As you go, change the drill heads to larger and larger until you get large size holes in the wood.


6. Once you have made enough holes, the wood will be compromised and you can use the punch and hammer to knock the rest of the wood out of the middle of the metal head.


7. Bring your replacement wooden handle to your metal head and double check that it is the correct size and shape. Remove the wood wedge from the handle and put it aside for later. Put the new wooden handle onto the metal head as far as you can by hand.


This is where things get a bit odd and if you do not know what you are doing, you can mess up your tool head. It would seem logical to me and most people to take a hammer and hit the head until it is in place on the handle. But that is not the way to do it, that will mess up your metal head. The proper way to do it, is weird if you do not mind my saying.
8. You take the tool now with the head on the handle and turn it upside down. You take a hammer and with the flat side of the hammer, you hit the holding end of the handle. It seems the way this works is that the vibrations from the impact will make the metal head wedge itself further onto the wooden handle. It seems like magic but it works.
After a bit of impact adjustment you will see the metal head has wedged itself down onto the handle. There will be small feathers of wood from the handle, these you will need to use a knife and clean off. It may take several sessions of upside down impact to get the metal head as far down on the wooden handle as you can manage. If the handle is too large, a rasp or file can be used to make the handle fit better.


9. You now put the whole tool back into the vice or table to hold it still for the next step. With the hacksaw again, you cut off the extra wood sticking out the top of the metal head. Cut it off so that it is again flush with the metal head.


10. You can still see the slit in the wooden handle top where the wedge will go. Take the wooded wedge that you put aside and place it into the slit in the handle top. Place a small board between the wedge and the hammer to protect the wedge. Take the small hammer and hitting the board, hammer the wooden wedge into place in the handle top. This will force the wooden handle to expand inside the metal head and make it more secure. This will make sure that the head will not work its way off the handle over time and use. As with the extra handle top, clean off the extra wedge and smooth the wood off flush with the metal head.


11. As we said before this tool had a metal pin in the center of the head, most tools do not have this. Take the metal pin that you had put aside. With a same size drill bit and an electric drill, drill exactly through the metal head where there is already a hole. Do try to get the hole straight or there will be bad screeching noises and it could damage your drill bit. When you have the hole done, take a small hammer and put the metal pin back in place. Of course, if your tool does not have a metal pin, then skip this step.


And there you are you now have a new wooden handle on your old tool head.

12. You can at this point, take sandpaper and smooth the top off. You can also take linseed oil or varnish to seal the top and bottom where you worked the wood. If you are artsy you can carve the wooden handle or paint it with cool colors and designs but this will not affect the tool’s effectiveness. If you are actually going to use the tool on the farm, you may not want to decorate it. A plain wooden handle is a classic look and feel. No matter what kind of tool you need to replace, this process will work for you. It is most important to get the correct size and shape wooden handle.
Some people like to carve their own wooden handles and that is great if you have that skill. It is fairly simple for a wood carver to make a handle the size, length and weight they want. Hand made handles can be carved by hand or on a lathe. Hand made handles can be made from whatever kind of wood you want to use, just be sure the wood will be hard enough to stand up under use or you will just be replacing it again.


If you are interested in other Homemaking Skills please check out some of our other talks below.
How to Start a More Self-Sufficient Lifestyle
Thank you for visiting and please come again for another edition of Out Standing in the Field.

Recent Comments